When working with AI, I advocate for what I call the Circle of Stability.
flowchart TD
  A[Known starting point] --> B[Plan a small task]
  B --> C[AI builds the small thing]
  C --> D[Save your work]
  D --> A
Version control fits into this circle by solving the Save your work step.
The naive way to save your work is to simply have your data saved as files on disk. When you do this, you have a single copy of Truth about your work. The danger is that when you enter the AI builds the small thing step of your Circle of Stability, that agent is working directly with your source of Truth! So if the AI makes a mistake, you have no way to revert back to your Known starting point.
Enter Version Control.
The most common version control system today is Git, of Github fame. Git stores a small database next to your files in a hidden .git folder:
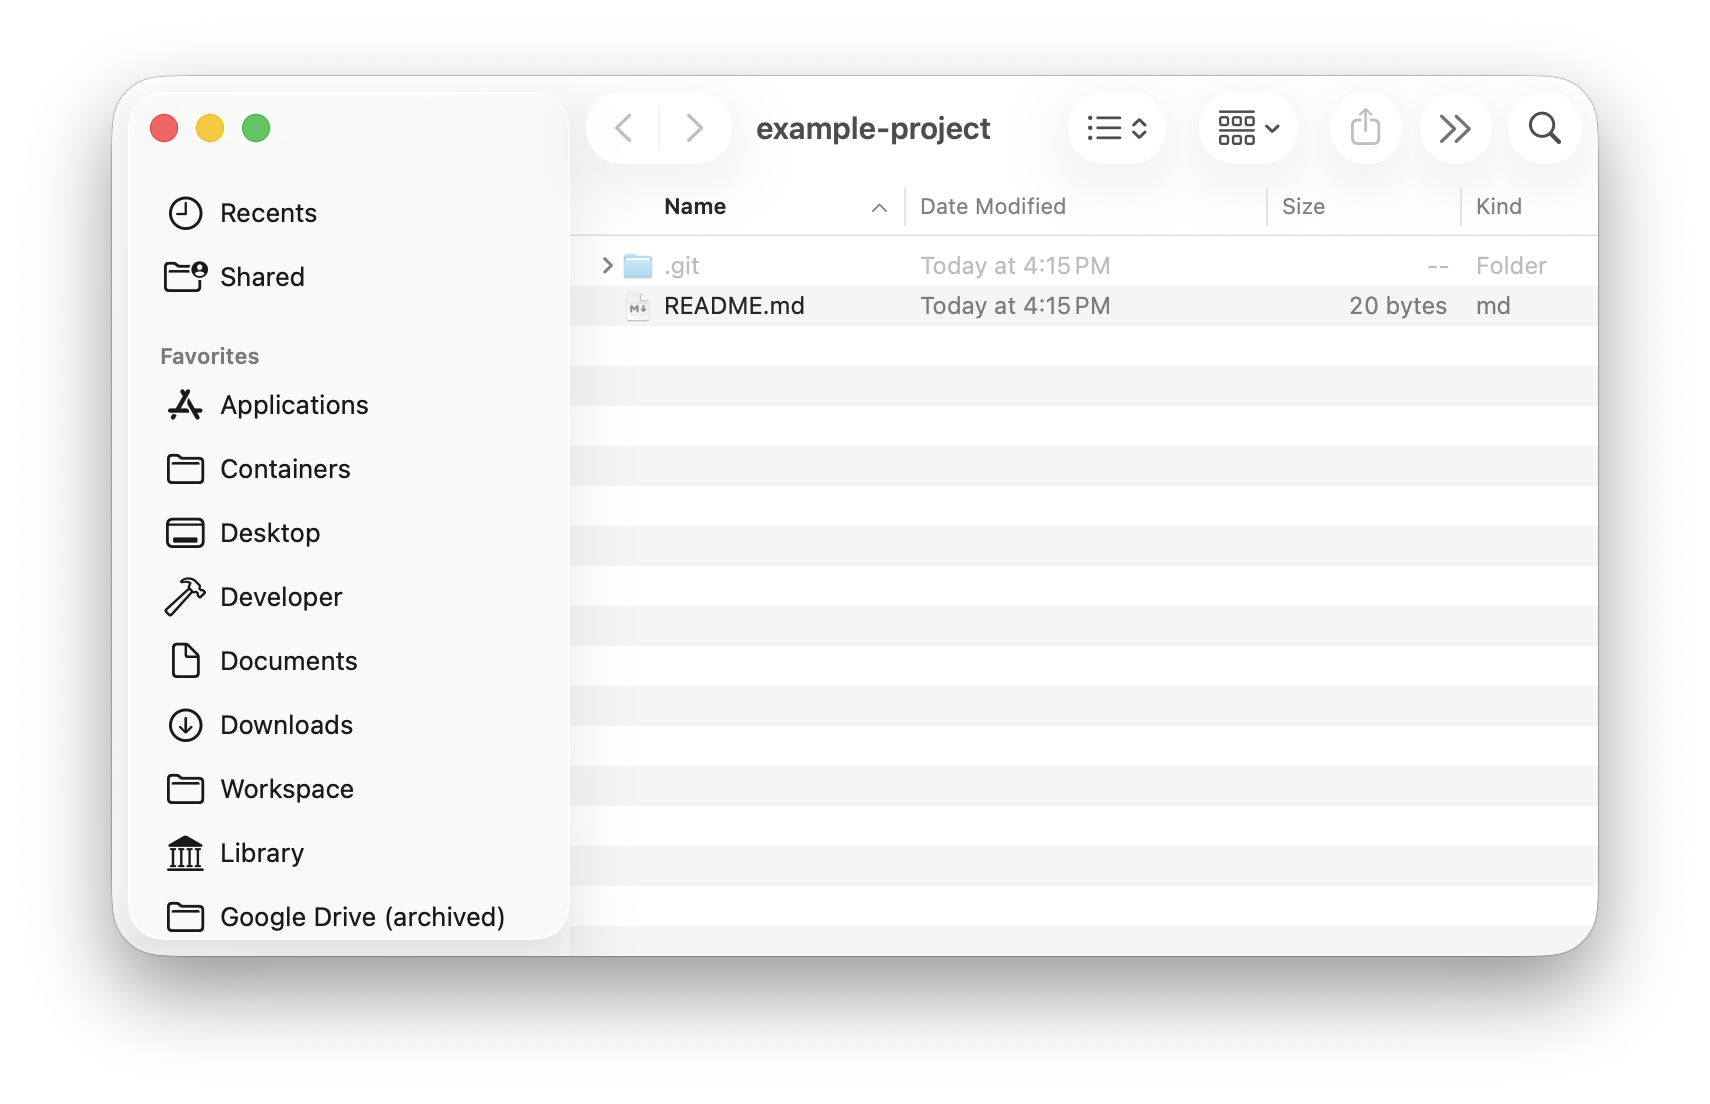
This lets you work with your files as your normally would, and whenever you want to save a snapshot of your files, you can ask git to make a commit.
Your first commit in your git repository holds the full files that you’ve added. A commit holds only the changes you have made to your files since your last commit. In this way, git can rebuild the exact contents of all of your files at any commit in history, simply by looking at the original commit and replaying every sequential commit’s changes over and over until the requested commit.
The Git Process
With git installed and all of your work added into a git repository, you can now freely make edits and commit (verb) your changes to add a new commit (noun) to your repository. In this way, you slowly build up a list of commits that represent your work’s state at the time of each commit.

If you ever need to undo some changes that you have committed, perhaps you realized there was a mistake that you hadn’t seen, then you can revert that commit.

The benefit of saving all of your changes as commits inside of git is that you can always checkout any commit in your repository’s entire history. When you checkout a commit, all of your files on disk immediately update to match the exact state of the files when that commit was made.
Now that’s safety! You can always get back to your Known starting point no matter what changes have been made by either you or an AI.
By default, each of these commits happens on your main branch. You can create new branches where you can edit and commit your work, separate from the main branch. Why would you want to do this? Sometimes you’ll want to try out an idea, and that idea is much larger than a single loop around the Circle of Stability. So you can create a branch → loop through the Circle of Stability many times, adding commits along the way → Decide later if its worth actually saving all of this work to your main branch. This way, you can preserve your Truth on main and are free to work on many different ideas in parallel without risking your canonical data.
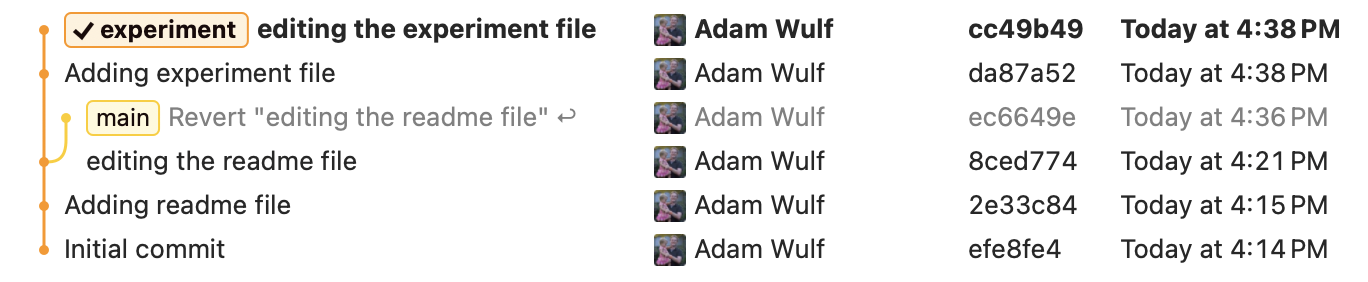
When I have multiple branches of work, each with slightly different histories of changes, I can switch between them by a checkout of that branch. Here, you can see I moved back to main and added more work.
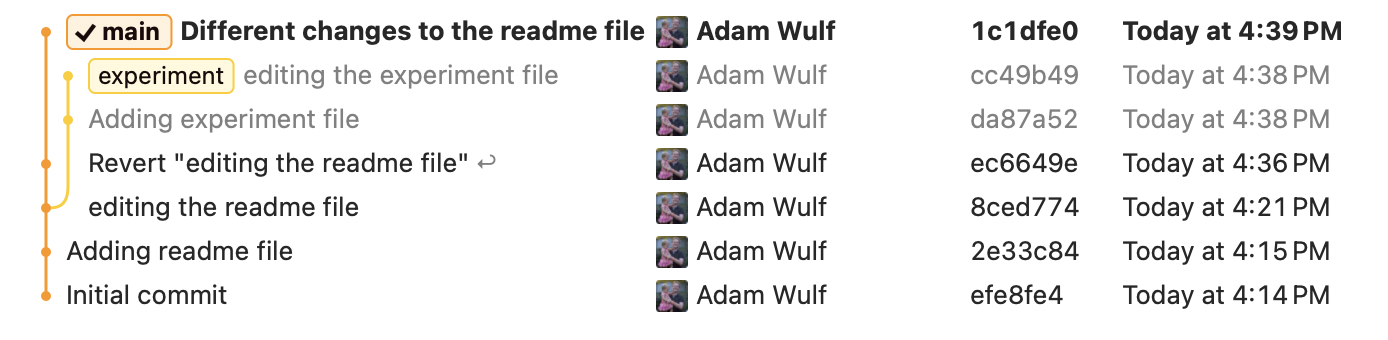
Whenever your branch experiments succeed, you’ll want to merge those branch commits into main. Doing this will join all of the edits you’ve made on main with all of the edits you’ve made on your branch.
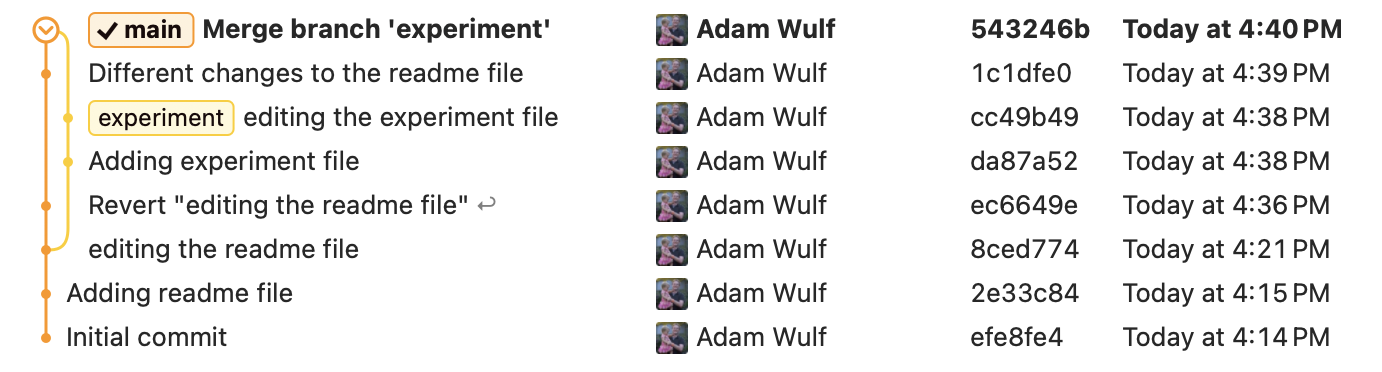
After merging my example experiment branch, my files on disk contain all of the changes I’ve made on both my main branch and my experiment branch.
Visualizing your Git History
I use Fork to easily visualize my git history, so that I understand exactly what branches exist, which branches have or have not been merged into main.
All of the screenshots above have come from the Fork app.
Your first Git repository
I recommend using the Github App to manage your git repositories. Github publishes a great step by step tutorial for setting up your first repository.
This tutorial walks you through creating your first repository, as well as publishing that repository to Github to share and collaborate with others.
Additional Resources
For further reading, I recommend: