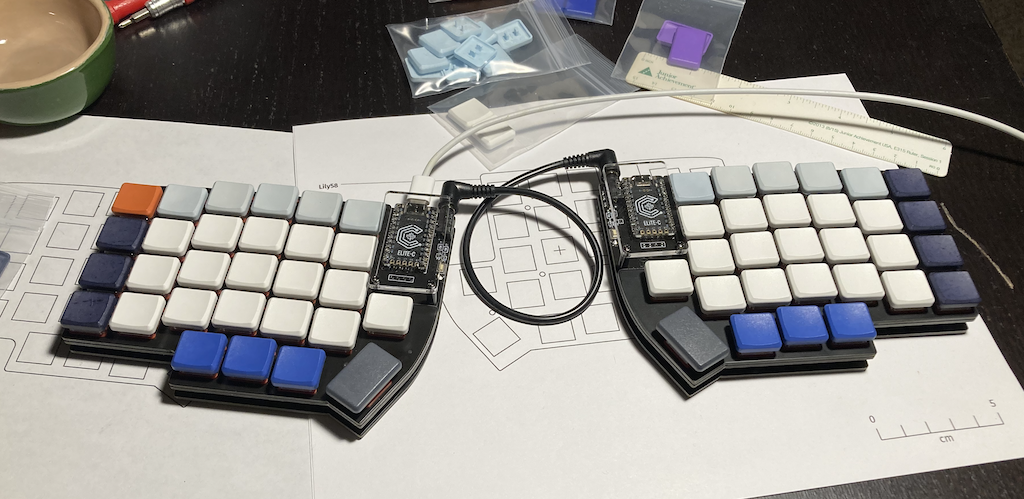
Over the past few months, I’ve been slowly transitioning to my new Lily58 Pro split keyboard. In addition to switching to this new keyboard, I’m also learning the Colemak-DH layout, so it’s been quite a process. Unfortunately, I can’t afford to move cold-turkey to the new keyboard, as that’d dramatically lower my productivity at work for a few weeks, so instead I’m learning in bits and spurts over the weekends and evenings.
For the past 10 years I’ve been typing on a MacBook Pro keyboard, so any other keyboard feels strange right out of the gate. While I’m really enjoying the new keyboard, the Kailh Pro Red switches I installed have a 3.2mm travel distance from top to bottom, while the MacBook butterfly switches have about 1mm travel. Even though the Kailh switch activates at just over 1mm of travel, similar to the MacBook, that extra 2mm of travel afterwards feels like an eternity.
This is particularly evident when typing a double letters, for example. I often bottom out the travel of the key, lift the key slightly before quickly pressing down again for the 2nd letter, but I find myself not lifting the full 2mm from the bottom to above the actuation point. This means that only 1 letter is registered, as they key was registered ‘down’ the entire time. My muscle memory is used to the short 1mm travel of the Apple keyboard, and I’d love to be able to shorten the Pro Red switch travel.
Yes, in time I could get used to the longer travel of the new keyboard, but I really enjoy having a forced stop at a much shallower distance. I’ve also noticed the keys have a sharp ‘clack’ sound as they bottom out, from the plastic hitting plastic inside the switch. As I type, I’m getting better at not bottoming out at all, but if it was quieter and shorter travel it’d be perfect.
All of this leads me to my first key switch mod!
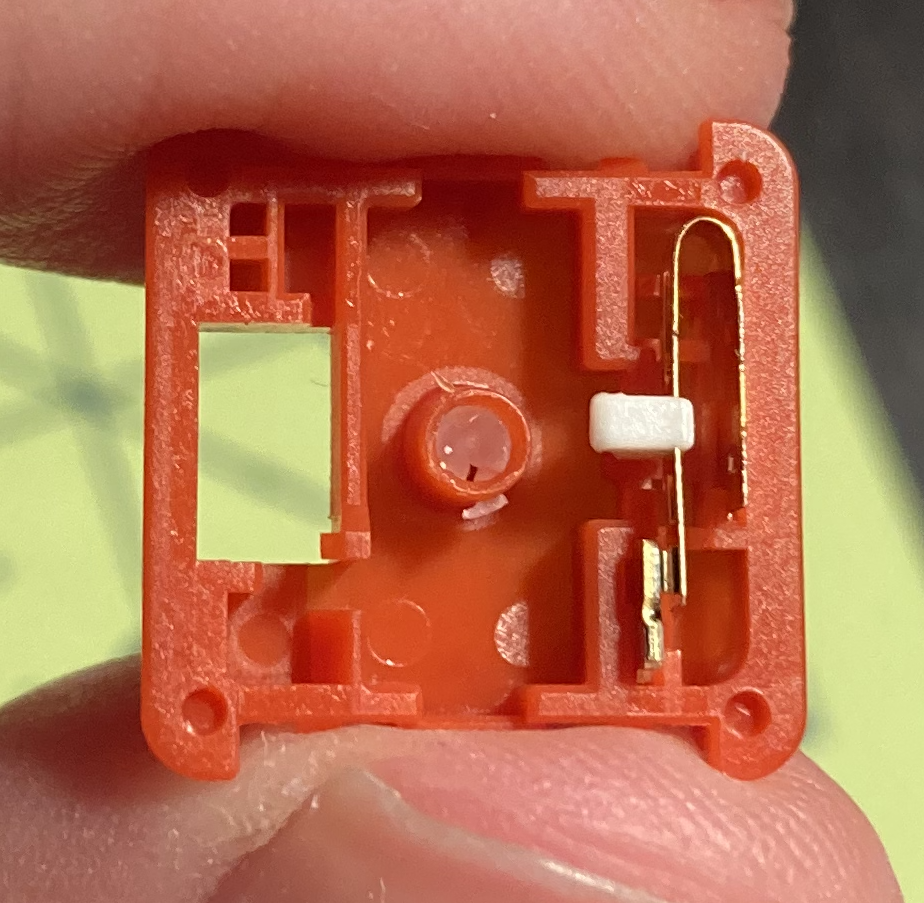
When the switch is taken apart, the stem on the bottom of the switch is hollow, and is what guides the stem on the top of the switch as it’s pressed. If I could fill a small amount of the bottom stem, that would shorten the travel of the top stem – perfect!
At first I tried small ball bearings. My thought was to find a bearing that would pressure fit within that column. It would stop the top stem, and since it would also be pushed against the walls it wouldn’t jitter as the keyboard moved.
I measured the hollow stem to have a roughly 2mm opening. I tried 1.5mm bearings, which ‘worked’ but rattled in the keyboard. These solved the travel distance problem but made the noise problem much worse. This was validation that at least 1.5mm of travel was indeed ‘extra’ and wouldn’t affect the behavior of the switch itself. If I could find the right material, this could work.
Next I tried 2mm bearings, but these were slightly too large to fit into the hollow stem.
My next idea turned out to be the winner – 2mm silicone rubber cord for $1.68. I bought this at the same time as the 2mm bearings which I’d assumed would fit into the hollow. Unfortunately inner radius is probably 1.75mm or so. While the 2mm bearings would never fit, I did find a solution with this cord.

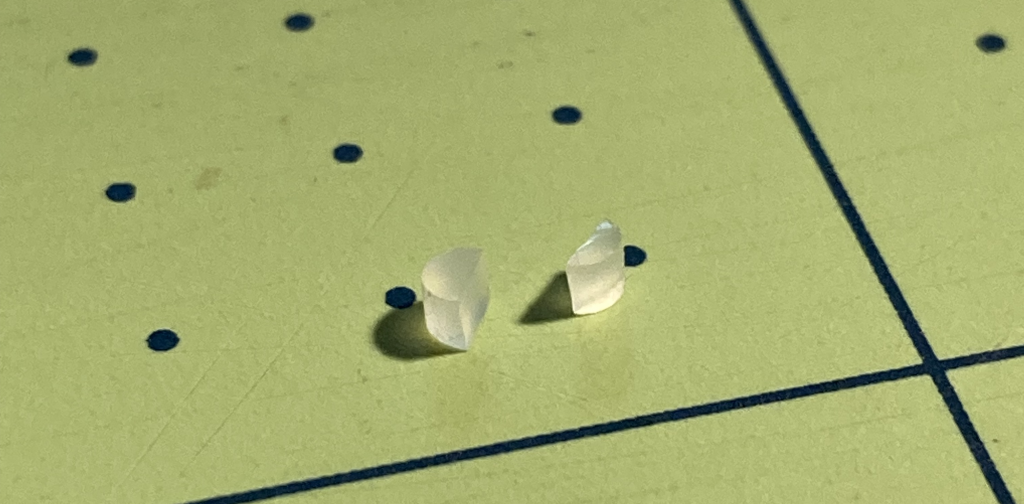
I cut the cord into 1mm thick disks, each having the 2mm diameter of the cord.
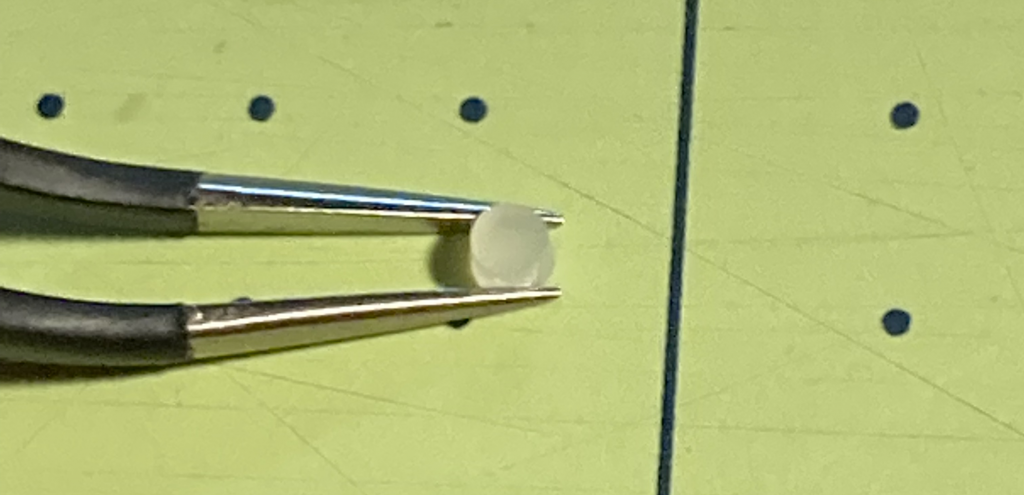
I then cut these disks into 2 semicircle halves.
To separate the switch into its components, I used tweezers to fit underneath the small clasps on either side of the switch. A gentle push would unbuckle each side, and the switch would come apart. I did manage to break a few of my switches, but overall I had a fairly good success rate.
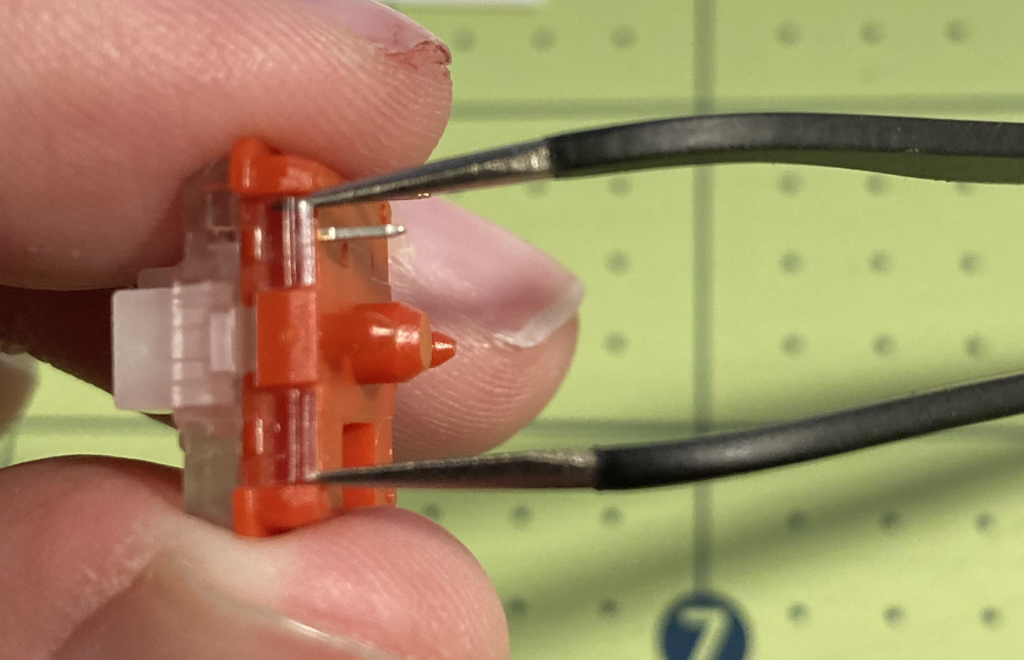
The top of the switch has a stem that slides down into a hollow stem on the bottom of the switch. It’s this hollow stem that we’ll fill with the rubber semicircle.
Then, using tweezers, I could squeeze this semicircle into the hollow of the stem, and it would hold itself in place. It was important to make sure the semicircle stayed flat in the tube. Its diameter is slightly larger than the tube, so it wants to stretch back out – and if one side of it is pushed too far down compared to its other side, it has a tendency to slide up vertically in the shaft instead of stay pressured horizontally. It’s possible to dig out the rubber from inside the stem, which I had to do a number of times, but it’s not the easiest thing to do.
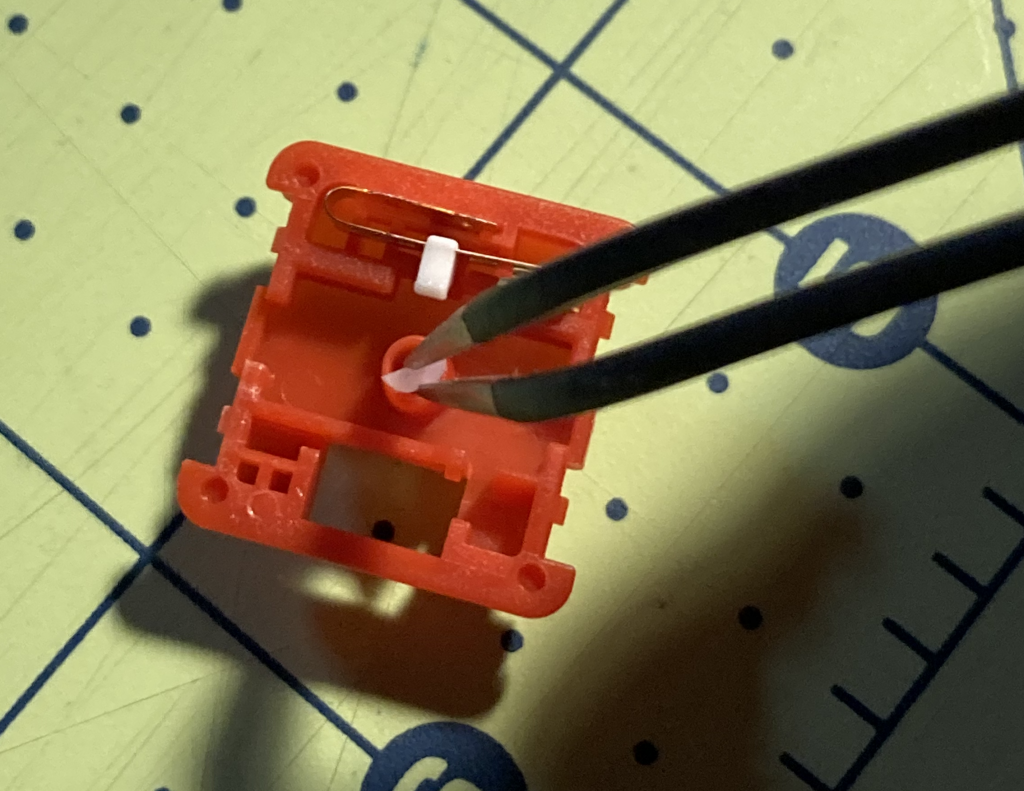
Once the semicircle of rubber is flat inside the hollow tube, I would gently re-snap the switch back together, and the top stem would push the rubber down to the bottom. It works great!
It removes 1mm of travel, and removes much of the clack sound that it had previously. And the rubber also gives a pleasant feeling to bottoming out the switch. There’s still some noise as the switch travels back up after the keypress, but the first bottoming out sound is nearly gone.
Overall I’m really happy with how this mod has gone. I’ve only done the primary white keys and the blue thumb keys, but that’s plenty as those are the most used keys by far. It took me just an afternoon and some patience to get the switches modded with the rubber.
A lesson learned: With my first attempt used 1.5mm disks, and I pushed the rubber to the bottom of the stem with the tweezers. But in this case, the switch didn’t activate consistently at all. I think it was because the semicircle likely rotated as I pushed it down with the tweezers, causing the full 2mm diameter of the semicircle to be vertical in the shaft instead of just the 1.5mm thickness. I’m also not sure if the bottom of that hollow shaft is rounded or flat, so the rubber might not rest flush at the bottom of the tube.
In any case, this took out too much travel from the switch and it no longer activated consistently. Switching to 1mm thickness and letting the top stem push the rubber evenly down the stem seemed to solved the issue.
After modding the main white and blue thumb switches, they’re all working perfectly now, with 1mm less travel and a quieter sound.